Change colors without render again.
Lesson by Ciro Sannino - Auth on May 30, 2011
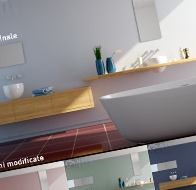
Do you want to modify your render but you have no time to render again? It is possible creating a mask in 3ds max and using Photoshop to apply all colors you want. In this post I’ll show you how to do that.
Learn from this Lesson >
Filed in: Photoshop, compositing
39