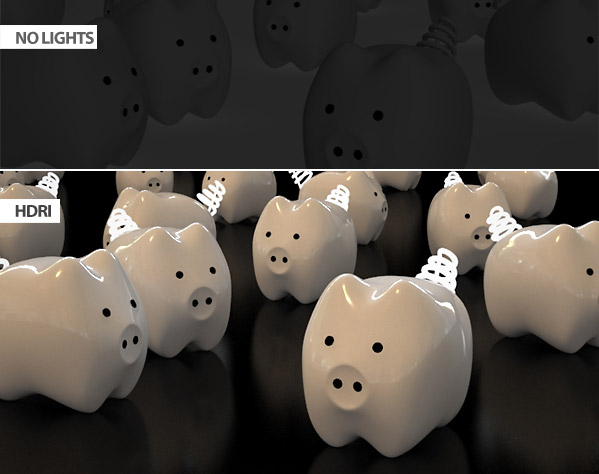
With Hdri Lighting you can get this image with just 1 V-Ray Light:

.
WATCH THE EXERCISE
CONTENT
- VRayHdri into a V-Ray Light (Dome) is the best solution for Hdri lighting
- Use “Store with irradiance map” to get faster preview
- Use “Region render” to get faster preview
- Create a VRaylightMtl to simulate self-illuminated objects
- Increase V-Ray light “subdivs” to reduce grainy
EXERCISE
Dear Premium member, clik the link below to download the full scene and repeat the same steps in the video.
Finally, check FINAL version to verify every setting. You’ll able to get the same result.
[private Premium|Premium-1year]Â LINK:Â DOWNLOAD PIG-SCENEÂ [/private]
– – –
With Premium Membership you also access to easy lessons like:
Global illumination setup and how to create basic materials easly.


Hey! this is great!:) I use 3dsmax 2011 and I cant find the “compensate camera exposure” butten? they have dark tails;)
Hi Roger!
it’s not for 3ds max 2011.. it depends on your V-Ray version, if you’are using the last one (2.2) you’ll find it.
In any case you can just increase the multiplier until your object become bright. it’s the same.. “camera exposure” just find the right value in 1 click.
Ah, thanks! 🙂
Hi Ciro,
Great tutorial, thank you!
But I have one question, might you instruct me:
How can I render PNG transparent background image (while still retain the pig’s shadows). I have tried setting the Limbo (Vray Object Properties -> Alpha Contribution (-1.0 value), ticked Shadow and Effect Alpha, UN-ticked Received GI.
However, I would never caught the shadows.
Thank so much for your help!
Hi Hai (it sounds nice!) 🙂
I’m not sure to understand your question. Anyway in the next month i’ll add some content related to this topic!