In this lesson I’ll talk about Light Balance.

INDEX
- Analisys of the light contributes
- How to use V-Ray IES as primary light
- Use V-Ray Dome and Plane
- Create the correct light hierarchy
- Why use exponential color mapping + VFB
- Professional workflow: lighting 1 by 1
- Fix overlapped faces
- Fix Light Cache imperfections
- 15 mins narrated video showing all the process
- Basic and lighted model for the exercise  / 80mb
Time to complete this lesson: 35 – 40 mins
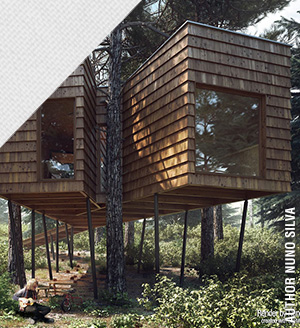
This is the final image every student could render after completed the full training.

(*) Result after completing light balance
(*) SUGGESTION
Before to start I suggest  to check the important lesson 2: “Setup 3ds Max and V-Ray for renders”
(linear workflow + test + final V-Ray presets)
LIGHT BALANCE
A great way to start building the light balance is having an untaouchble starting point. Something fix we won’t move: this element let us build a stable light balance. This element is the camera.
V-RAY PHYSICAL CAMERA
Settings:
- f aperture = 8 / default
- Shutter speed = 50 Â (it is a fraction of second, actually it means 1/50)
- ISO = 100 / default
- White Balance = neutral
[private Premium|Premium-1year|bluevilla|5trainings]
The camera is our “column” to start: the correct approach is ALWAYS thinking the light hierarchy: we need to focus who are the Primary, Secondary and Fill lights.
The correct workflow is working 1 light category per time. Work on the only primary lights, when they are ok turn off primary lights and work only on the secondary lights and so on.
In this video I’ll show you how apply these concepts:
I really feel sorry for my english! 🙁
I just do this because I know that a lot of you prefer narrated versions.
NOTE: About Color Mapping and Curves.
In this video I used “Exponential” as color mapping and I modified curves in the v-Ray frame Buffer.
I did this way because I know that strong lights in the interior and soft light in the exteriors will be difficult to manage in a linear space. Especially working in interiors with artificial lights the overexposure is unavoidable so exponential is the best solution. Finally curves help me to better control the quantity of lights between brighten and darken areas.
For more details about these concepts, please check:
- Lesson 6:Â V-Ray Frame Buffer (as know as VFB)
- Lesson 7:Â How V-Ray IES works
- Lesson 10:Â Understand Color Mapping
FIX ARTFACTS
Fix light cache leaks and imperfections:
Fix overlapped faces:
This issue is usually caused by imported 3d models. You can delete all overlapped faces or modify Secondary Rays Bias who produce a little-invisible detaching of every face in the scene, solving the problem.
Light balance is complete: THIS IS THE FINAL LAYOUT.
With a perfect light balance, achiving a great render will be a piece of cake!
 Â Exercise
 Exercise
The exercise consist in download Blue Villa – Basic model and working on it in order to create the same light balance. Think about light hiearchy and imitate this result:
Note: This image was produced with V-Ray 2.30 and 3ds max 2011
(Very little differences are possible between different versions)
DOWNLOAD THE FILES TO TRAIN YOURSELF
and get prepared for 5SRW Certification:
- Blue Villa – Basic model | OBJ Version / to start
- Ies File / for V-Ray IES
- Blue Villa – Light Balance Complete / to verify
This scene is compatible with 3ds max 2010 or superior
[/private]
 / Also Learn Corona Renderer


Hei Ciro I did the exercise and it was worndeful. I really have to thank you becasue you are a real teacher and I feel I’m seriously learning every day on cg blog. Gracias.
Hello
Thank you but the ies is missing..:)
Thanks
Hi Jennifer,
not anymore 🙂
Thank you!
waoooo…. Excellent work ….. would be another great addition in your helpful Tutorials Collection……… Good Luck ! :-O)
Great man… you are rox… really nice tips…
this training in fantastic… and the video is really easy to understand and to apply!!!! another great work ciro!
AMAZING IMAGE! I feel I’m learning every day… you have an huge skill in making easy the most complicated concepts. SUPERB JOB!
Ciro ! will be nice if you do scenes Exterior Night and Day !!! and I can’t wait next week
I can’t wait for the next training Ciroooooooooo!!! wonderful job… my dream was render night versions of my renders and now I understood how to do. Thank you!!!!!!
wow Excellent. . . ..
especially this video tutorial!
Oh my god.. this training is really impressive how it is simple too understand, and how great is the result!!!!
good job thanks
Why my computer is running slow for this scene, maybe you can help me.
Intel core i7 cpu 920 @ 2.67ghz, 24.0 gb memory (ram), nvidia geforce gtx 465 4096 mb total available graphics memory, primary hard disk 931 gb total.
Excellents tutorials. THANKS
Hi Alejandro,
what is your time with TEST-preset?
Sorry to bother you, was slow because I was missing the IES file, now is ok, I think.
The final-production render time is 0:05:27
Great! 😉
your english is fine 🙂 dont worry
Hi Teacher! Great Tutorial… ies is missing
Thank you Renante!
IES is here:
https://www.cg-blog.com/files/prem/bluev/ies-file.zip 😉
oooooo………….. very good render how is it possible to this render please teach me in detail with file.
great work!
very well explained tutorial. even better artifacts removing tip. Thanks again.
Hello Ciro!
Great tutorial. Having in mind a simple methodology we can create amazing scenes.
I would like to ask whether it is better to use an HDRI or an EXR file into the dome light instead of color?
Another one question about the scenes we exercise on them. Can I use them in my online portfolio? Of course personally I have prepared different scenes according to what atmosphere I wanted to create, but following your advice. Should I use a credit with your name or something else because the scenes are ready from you?
Hi Viktoria,
you can use HDRI or EXR, it’s pretty the same (I prefer Hdri bacause are smaller files) – Of course you can create your own versions and put them in your portfolio 😉
Thanks Ciro!
I will let you know as soon as I finish my site.
Great tutorial!! so If I apply FIX ARTFACTS tips, I can resolve splotches along english style cornice/skirting/beading, can I?
Most of cases “yes” 😉
Thanks again sir for this wonderfull tutorial.
hi Mr Ciro
thanks for this wonderful tutorial of yours
i learn another technics thanks man…
tasis
Great lesson Ciro,
very organized, clever way of working, great display !!
Hi Ciro,
I have spots everywhere all the pixels have a bit color difference one from another affecting the render, so my immage is not clean at all . I try to fix them overlapping the face as you shown in the pic example above , but this noise had only a litlle reduction on my render.
I tried also to use the preset for the final render that you gave us in the beginning , but the spots are increased.
Suggestion please
Great Tutorial man. Many many thanks
Brilliant explanation, very useful, thanks Ciro
Hi Ciro,
Thanks great tutorial.
But I couldn’t find the maps for the scenes. Are they in the ZIP files?
Don’t worry Rodrigo,
btw you don’t need these maps at this step.
First of all nice tutorials.
I’m not sure what’s happening but when I try to render the scene with the 29 IES Lights the rendering comes out completely black. I added a regular VRAY light and it lights the scene but I can’t figure out why the IES lights won’t work.
Hopefully, you can help me figure this out.
Hi Michael,
the dark scene the exercise you carried out… OR for the FINAL scene you dwonload and just pressed “render”?
I’m doing the exercise
Cyrus first want to thank for its super classes. I need a help, I have an environment which is a hotel lounge with 15 meters wide and 25 meters deep and 6 feet tall, carpeted floors and walls with soft texture of wood. What is the ideal light for this case???
Alvaro Henrique – Brazil – Rio de Janeiro
Hi Alvaro,
lighting is really easy… is not about tips or tricks: it’s just about the reality. If you know the REAL lighting project is easier, the difficult starts if you don’t know it. So the question is not about VRAY. It’s just about how to light your environ in the real world. Forget V-Ray.. do you know how lighting works in this environment, in the real world?
Thx u Ciro,
I’m beginner in 3ds max (big zero), but I learn a lot from u cause it’s easy to understand. You’re great teacher…… Now,3ds max is fun for me….CG-Blog the best….
Hi Ciro,
My first time here. One question please:
Did this exercises have 5 steps, like the others?
Yes Alessandro,
but every scene has steps more interesting by others in order to get 5SRW Certification. I’ll publish another lesson for this training the next week 😉
Isto é FANTÃSTICO!
Parabéns Ciro!
Hi Ciro,
Its really nice tuts.
I want to ask one thing that How we decide hierarchy? means
which light we count in primary , which in secondary?
& its vary in every scene or same hierarchy is there.
One more thing ,I can not render
when I click on render button ,just blink render window then
nothing is render.
Thanks
Hi Hina,
the most important thing is DECIDING that you’ll have a primary and a secondary light. It’s on your taste, but is important create a balance from different lights… or you’ll have a flat or unpredictable result.
PS about your issue, what is the max files you’re talking about?
Hi Ciro – Just a question about the viewport for this exercise. When i open the file in 3DS 2013, and have 4 views in viewport (top, left, front in wireframe and camera in shaded view) WHen i click and drag to rotate and move around, it kind of lags a bit? Is that normal? FPS is about 3.6 frames ps.
Thanks
Simon
Hi Simon, basically is depends on your graphic card and visualization type. In these situation I just try to work with ust 1 viewport or I avoid to use wireframe to speed up the frame rate 🙂
Thanks Ciro, I have a GTX 460 – which graphics card would you recommend to make it better?
Hi Sirmontal,
a different Graphic Card to work with Real Time is not for BETTER, but for FASTER.
Just choose the GTX with more CUDA cores as possible! 😉
Hello Ciro. When a test the Vray Dome light it doesn´t work with the vray camera. If I render a perspective view it renders fine. when I render by the vray camera it´s completely dark. Any idea what is going on? By the way I am using Vray 1.5 and Max 2011.
Ok Ciro I figured it out what was going on. I had to raise the multiplier to 30000 to get same effect you had with multiplier 30. Probably some modification in units for version 2.
?Hello Ciro,
i have not V-Ray 2.30 ! now what can i do this lesson? How i can use this file? if i open it with V-Ray 2.0 any problem this settings ?
Absolutely not 😉 no problems!