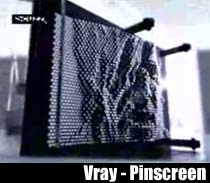
[ Vray Tutorial ] – In the 2005 the Nine Inch Nails made a new video: Only. It was a great success, especially among 3d lovers in the world!
Many people like its music, but the 3d lovers like the videoclip because it’s made totally with Vray! Vray Render is the really main actor in this 3d short movie!
The Photorealism is amazing, but the special effect who surprise everyone is that you can see at 1’30”: the singer appears in the Pinscreen singing!! That’s a gret effect… but not so complicated to realise.
Suppose to start from a 3d head model. This is the idea:
- Render a sequence with Z-Depht (front view)
- Use these images as Vray Displacement Map!
- Final Render
Et-voilà , it’s done!
This is the summary of the Alzhem Tutorial. Here the link… enjoy it!
 / Also Learn Corona Renderer


Hey! welcome back!! we missed this blog!!! its so infructive!! and a lot of good informations!!! thnks for all and keep posting please 😀
So what if we want it to be animated ??!!!!!!!!!
i mean u’ve insert the result to photoshop to pixelate it and give the very nice effect
i don’t think we will insert every frame into photoshop
so i’ll be thankfull if u replied
Hi Mohamed… thank you so much 🙂
@ HASAN
The tutorial explains how to obtain this effect with a single frame. If you want to animate it you could create an action and setup a batch process in Photoshop.
Maybe you can use After effects…
Good luck 🙂
pin tutorial was excellent
its good but I dont know how to creat… am new in this area, how I creat it?
Nice post man! Although, what if I don’t have vray? Can you aslo use a simple max displace modifier? Plus I noticed the displaced objects in the “Only” video are instanced modeled nails and not just simple cylindrical dots. How do you achieve that? Thanks!
goooooooooooooooooooooooooooooooooooooooooooooooooood
I didn’t look too much but I don’t think it’s as simple as it looks ^^
first the map for the movement of the nails, I don’t think it was rendered, it’s probably live footage, the work start here, I’m not sure if it’s only normal footage that was used to give an illusion of depth or something more complex, if it’s complex, I can think of multiple methods to get something that works as a height map:
– lighting tricks with black background , subject with very few contrasts, lighting perpendicular to point of view.
-reconstructed depth from 2 or more cameras at different positions (there is some software solutions available for that and at this level of detail it works like a charm).
After that the movement of the nails are “linked” to the footage in a similar way as displacement, the map associated with displacement move vertices’s along normals based on luminance values of the map while in this case the map is used to control the position of the nails on an axis between a max and a min position also based on the luminance of the map.
I think it’s possible without scripting I already did something similarsome time ago, I captured a visualization from an audio player and then used it in 3dsmax on an array of cubes to make them “jump” along the music.
While trying to reproduce the effect I watched the video again and saw this:
http://www.youtube.com/watch?v=qx4VLO2u1E0
That explain the “footage” part.
I found multiple methods to move the nails based on the footage:
-using a displaced plane as a PFlow emitter and the nails as particles, it’s fast and does the trick.
-displacing the nails on a single axis with prepared footage so that the nails don’t deform.
-scripting the “stick to a displaced plane” part avoiding the use of pflow (might be more of an “academic” solution than pflow)
-scripting directly the position of the nails based on the luminance of the footage (pain in the ass if you ask me)
Thanks KYIS … I added your link “behind the scenes” to the post!
HELLO, SOMEONE CAN EXPLAIN TO ME HOW TO INSTALL VRAY?
THANKS
Link with tut is dead …
Thanks I updated the link 🙂
Anyway following the istructions I spent just 30secs to find the new link.
i m a big fan of you!!!!!! thank you very mutch for every thing !!!!!
v nice
3d is my life