In my last Live-Training (in Italy), Alessandro Pellegrini made this wonderful Render:
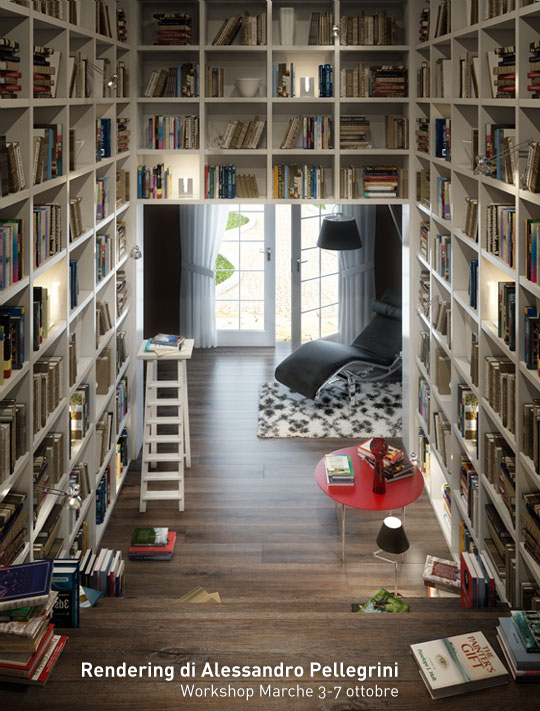
This is  the perfect image to say something about the Reflection Maps.
In the following image reflections are glossed. Leaks have been modeled in 3D, but the whole surface has just uniform reflections.
Here a detail of the scene: we can appreciate it a little bit more 🙂
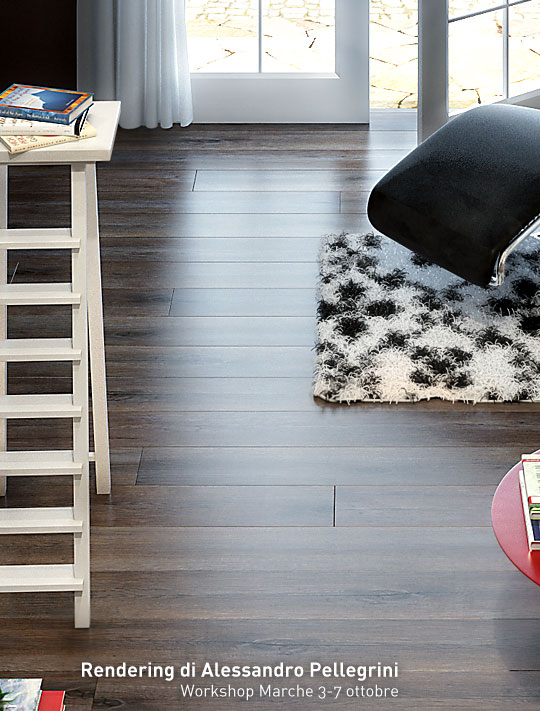
But for aged wood simulation, uniform reflections is not the right solution. We need to controls the reflecions, making some points more reflective than others. The knots of the wood – for example – must reflect much less. This can easily be achieved by inserting another map in the ‘REFLECTION’ slot.
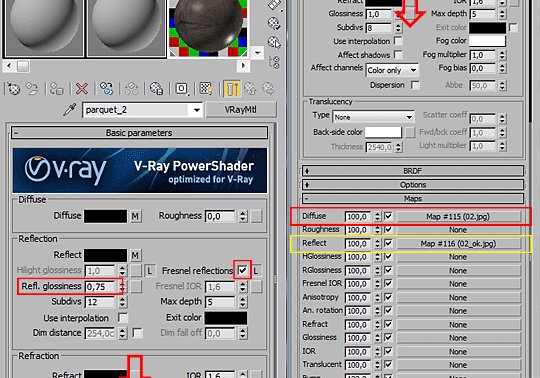
For this material we will use 2 simple maps:
1 – One in the Diffuse channel (where usually we have the classic textures)
2 – Another in the Reflecion channel
That’s how they look, just to figure out: Â (yes, yes .. after you download;-)

Here a simple way to simulate an aged wood:
Examples: no reflections(1), uniform reflections(2) and finally mapped reflections(3).
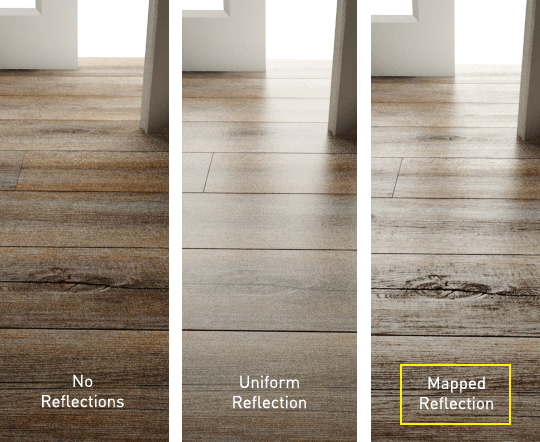
1) No reflections: Â it looks strange. Light is missing on its surface.
2) Uniform Reflections: just Glossy 0,75. Good for new floors.
3) Mapped Reflections: Â Glossy 0,75 + Reflection Map: Good for aged floors.
Of course you have to play with these parameters to find the right balance. Sometimes copying this maps also in RGlossiness and Bump channels is helpful. You just have to try and play around.
Usually, the reflection maps are ready to use in the materials in libraries you can buy online. They often have the suffix _refl or _reflection. If you want to create your own map by photoshop: start with black and white and increase contrast with levels and curves.
.
Can not miss some advice to get crisp textures in renders:
- For the final rendering, use the Adaptive DMC antialiasing (min / max – 1 / 16)
- For each texture go into the channel and set Blur: 1.0 -> 0.5 (or less)
- For each texture go into the channel and set: Filtering > summed area (or none)
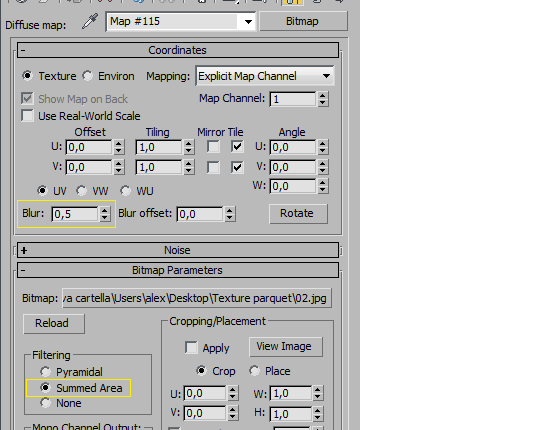
Finally, a “beauty treatment” in Photoshop > unsharp mask (radius = 1px) will give a nicer look to  your wood 🙂
The final result can be also accentuated with the Elements and a bit of compositing, but that’s another story.

In this video I show you how to start from a simple texture, transform it in a “reflection map”, apply in 3ds max and V-Ray.
- Watch the video
- Download THESE FILES and repeat the process
- Open “FINAL” and check if it is correct
 / Also Learn Corona Renderer


Hey CG Blog… Its one of those best tutorials I have been looking for… Thank you very much for this tutorial… Here is my Facebook page totally dedicated for VRay… http://www.facebook.com/vraypage I have shared this tutorial on my profile and now would be posting it on the page. I hope you would not be offended with that and I am not stealing your work… Any way, thanks a tonne for this tutorial man… You rock, One of my favorite internet teacherss….
great points to remember. well done.
thanks alot
i really love your toturial. it was great. thank you..
This is great tutorial 🙂
Very Exciting and new tutorial,,, I liked that…. Great!!!
really nice work and your presentation style is amazing 😉
amazing rendering and great tutorial thanks a lot
Thanks Ciro!
really appreciate ur effort.
Great tutorial and a very nice presentation 🙂
thanks…Ciro…
thanks for sharing
this is very helpful. I will try it in Rhino. thanks 🙂
It’s great. Thanks for sharing.
thnks alot…gd tutorial
Thanks
THANKS FOR SHARE ! LOVE TUTORIAL..^_^.
nice:) thanks
great tutorial!! thanks!!
siip…..thankyou2…
As perfect in all technical aspects as it is , this rendering seems a bit flat to me .. Kinda lacks “depth” , especially the top part of bookshelves which, in my opinion have too much light ..Yet , reflection tutorial , as always , perfect and detailed to the last bit ..
thanx a lot sir Ciro Sannano
u r a very good man in 3d…………….
perty nice,,,, i’m tray now,,!!!
best the way…hell yeah,,,
nice tutorial thanck’s
superb…..hope u will continue to share ur knowledge
Thanks a lot man , the holy grail has been revealed ! 🙂
great! it does come in handy thanks.
“Download the files below and repeat the process”
Ciro, I cannot find the download link for this tutorial. Thanks.
Hi Kevin, please check again.. I modified the link 😉 Now is before the video!
Very great tutorial, my result:
https://www.dropbox.com/s/la3h5i08buwh742/grindukes3.png
great n thankz Ciro…..
Ciao Ciro grazie davvero per i tuoi tutorial, spero prima o poi di poter partecipare anch’io ai tuoi corsi 😉
Wow this is nice! But I would like to know also what apropriate sizes of image(jpeg) I can use in an object. Because i saw some tutorials like the archviz, they use different kinds of texture sizes, depends on their object sizes. I haven’t seen any tutorials explaining about this.
I hope you could
Thanks so much man more power
very helpfull..thnk you so much..
well done
Thank you, man
Muchas gracias, muy profesional el aporte
Thanks…very nice